Finding a leak & replace washing machine soap draw fill hose
This video will show you how to replace a washing machine soap draw fill hose and find the leak. This video Can be used on Ariston Indesit Hotpoint and whirlpool manufactured machines.
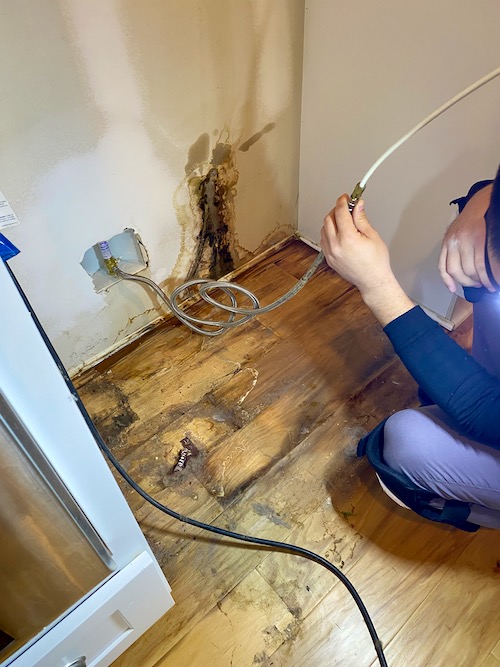
Finding a leak on your washing machine is a daunting task especially when the cabinet is welded together. I will show you how to find the leak, some techniques for understanding where the water is coming from, and also how to replace the fill hose on this Hotpoint manufactured machine
first, you’ll need to find out where the leak is coming from. See the video on this
To replace the washing machine soap draw fill hose you will need to take the lid of the washing machine then you will need to remove the facial panel. Next, you will need to remove the soap drawer and disconnect the water valves; the box can then be removed after you have unclipped the hose. Remember on a lot of models the front steel panel will not come off so space to work is tight.
Remove the hose and clean all surfaces then fit the new one I suggest using debor glue as this is designed for use with appliances
1st peal of door seal on a washing machine to see soap draw fill hose
4th Take of the soap box
2nd Removing the facial panel on a washing machine
5th Replace the hose and re-glue to drum
3rd Remove a water valve wiring
After fitting new hose test machine for leaks after refitting al parts
ARISTON
WMF 729B AUS, WMG 720B EX, WML 601 HK, WML 821 EX

HOTPOINT
RSG864JUK, RSG964JUK, SWMD 8437XR UK, SWMD 9437K UK, SWMD 9437XR UK, WMAL 621P UK, WMAL 641G UK, WMAL 641K UK, WMAL 641P UK, WMAL 661G UK, WMAL 661P UK, WMAOD844PUK, WMAQB 641P UK, WMAQB 721P UK, WMAQB 741G UK, WMAQB 741P UK, WMAQC 641P UK, WMAQC741GUK, WMAQC 741P UK, WMAQF 621G UK, WMAQF 621P UK, WMAQF 641G UK, WMAQF 641P UK, WMAQF 721G UK, WMAQF 721P UK, WMAQG 641G UK, WMAQG 721P UK, WMAQG 741P UK, WMAQL 621G UK, WMAQL 621P UK, WMAQL 641G UK, WMAQL 641P UK, WMAQL721AUK, WMAQL 721P UK, WMAQL 741G UK, WMAQL 741 P UK, WMBF742GUK, WMBF742KUK, WMBF742PUK, WMBF763PUK, WMBF 822P UK, WMBF844GUK, WMBF844PUK, WMBF944GUK, WMBF944KUK, WMBF944PUK, WMBF963PUK, WMEF 641P UK, WMEF 7025P UK, WMEF 702P UK, WMEF7225A, WMEF 7225A UK, WMEF 7225P UK, WMEF722BCUK, WMEF 722G UK, WMEF 722P UK, WMEF 742G UK, WMEF742PUK, WMEF 762P UK, WMEF 923P UK, WMEF 943P UK, WMEF 963G UK, WMEF 963P UK, WMFG 611G UK, WMFG 611P UK, WMFG 631G UK, WMFG 631P UK, WMFG 641G UK, WMFG 651P UK, WMFG 741G UK, WMFG 741P UK, WMFG 821P UK, WMFG 821P UK.C, WMFG 942P UK, WMFL 833 G UK, WMFUG 742G UK, WMFUG 742P UK, WMFUG842GUK, WMFUG842GUKC, WMFUG 842K UK, WMFUG 842P UK, WMFUG 842P UK.C, WMFUG942G, WMFUG 942G UK, WMFUG942GUKC, WMFUG 942P UK, WMPF 742G UK, WMPF 742K UK, WMPF 742P UK, WMPF 762G UK, WMPF 762P UK, WMPF 823P UK, WMPF 843G UK, WMPG 742B UK, WMPG 742G UK, WMPG 742P UK, WMPG 762G UK, WMPG 762P UK, WMSAQG 621G UK, WMSAQG 621P UK, WMSEF 621P UK, WMSFG 621P UK, WMSL 501P UK, WMSL 521P UK, WMSYL 621G UK, WMSYL 621P UK, WMUD 823 P UK, WMUD 843 BC UK, WMUD 843P UK, WMUD 843PX UK, WMUD 843PX UK.C, WMUD 942B UK, WMUD 942 G UK, WMUD 942K UK, WMUD 942 P UK, WMUD 942P UK.C, WMUD 943PX UK, WMUD 962 G UK, WMUD 962 P UK, WMUD 963P UK, WMXTF 742G UK, WMXTF 742K UK, WMXTF 742P UK, WMXTF 822G UK, WMXTF 822K UK, WMXTF 822P UK, WMXTF 842G UK, WMXTF 842K UK, WMXTF 842P UK, WMXTF 922G UK, WMXTF 922K UK, WMXTF 922P UK, WMXTF 942G UK, WMXTF 942K UK, WMXTF 942P UK, WMYF 822G UK, WMYF 822P UK, WMYF 842G UK, WMYF 842P UK, WMYF 862P UK, WMYL 6151B UK, WMYL 6151P UK, WMYL 6351G UK, WMYL 6351 K UK, WMYL 6351P UK, WMYL 641P UK, WMYL 6551P UK, WMYL 661G UK, WMYL 661K UK, WMYL 661P UK, WMYL 7151PS UK, WMYL 8352 B UK, WMYL 8352P UK, WMYL 8552G UK, WMYL 8552P UK

HOTPOINT-ARISTON
EFML 823 FR.C, EFML 923 EU.C, FMD 722MB EU, FMD 723MB EU, FMD 823B TK.C, FMD 823MB EU.C, FMD 843B EU, FMD 923BS EU.C, FMD 923XR EU.C, FMD 943BX EU, FMD 963B SK.C, FMDN 723B CZ, FMDN 823B CZ.C, FMDN 823XR CZ.C, FMF 602S C TK, FMF 7025B TK, FMF 7081BS TK, FMF 801 TK, FMF 823BC EU, FMF 823B FR.C, FMF 923B FR.C, FMF 923K EU.C, FMF 923 TK, FMG 602 TK, FMG 702S C TK, FMG 703 C TK, FMG 722BS C TK, FMG 722W PL, FMG 723BS TK, FMG 723MB EU, FMG 723M EU, FMG 743B FR, FMG 743 SK, FMG 823B EU, FMG 823M TK, FMG 842W EU, FMG 843XR EU, FMG 863 SK, FMG 923B EU, FMG 923B FR.C, FMG 923M TK, FMG 943B FR.C, FMG 963B FR.C, FML 703 EU, FML 903 IT.C, FMSDN 623B CZ, FMSDN 623B PL, FMSF 502 TK, FMSF 6082 TK, FMSG 602 TK, FMSG 623B EU, FMSGN 623B CZ, MVE 111419 X CIS, RPG 724 DS IT, WMD 10219B CIS, WMD 11419B CIS, WMD 622 EU, WMD 702 EU, WMD 722B EU, WMD 752 SK, WMD 762 SK, WMD 763BQ EU, WMD 822 B FR, WMD 823B EU, WMD 823 B FR.C, WMD 842 B CIS, WMD 843B EU, WMD 843BS EU, WMD 863B EU, WMD 9218B CIS, WMD 922 B FR, WMD 922BS EU, WMD 923B FR, WMD 942 B FR, WMD 942K EU, WMD 943BS FR, WMD 962BX SK, WMDN 7225 B CZ, WMF 601 EU, WMF 601 PL, WMF 601 SC TK, WMF 602C TK, WMF 700 EU, WMF 701 EU, WMF 7025 B TK, WMF 7025 EU, WMF 702 B IT, WMF 702B TK, WMF 702 EU, WMF 7081BS EU, WMF 722B IT, WMF 722BSC EU, WMF 722 EU, WMF 722 FR, WMF 801 EU, WMF 802 B IT.C, WMF 802 EU, WMF 802 IT, WMF 822B EU, WMF 822B EU.C, WMF 822 BX TK, WMF 823 FR, WMF 823K FR, WMF 903 B IT.C, WMF 903 EU, WMF 923 EU, WMF 923 EU.C, WMG 601 TK, WMG 602 EU, WMG 621BS EU, WMG 621SC TK, WMG 622B EU, WMG 641 EU, WMG 642 SK, WMG 662 SK, WMG 7025 C TK, WMG 702C TK, WMG 702SC TK, WMG 722B EU, WMG 722B IT, WMG 722BSC TK, WMG 722 PL, WMG 722S EU, WMG 723B IT, WMG 742B FR, WMG 742B NL, WMG 742 EU, WMG 803 TK, WMG 822B IT, WMG 823B EU, WMG 823B EU.C, WMG 823 BX IT.C, WMG 823 C TK, WMG 823 C TK.C, WMG 825 B CIS, WMG 843B FR, WMG 9018B CIS, WMG 9019B CIS, WMG 902 IT, WMG 922B EU, WMG 922B FR, WMG 922B IT, WMG 923B FR, WMG 923B IT, WMG 923BX IT.C, WMG 942BV EU, WMG 962B FR, WMG 963B FR, WML 601 EU, WML 601 GR, WML 601 IT, WML 6081 EU, WML 6081 IT, WML 6081 TK, WML 60 EU, WML 621 EU, WML 622 IT, WML 701 EU, WML 702 IT, WML 70 EU, WML 722 EU, WML 801 EU, WML 803B EU, WML 80 EU, WML 822 B FR, WML 822S FR, WML 823B FR, WML 902 EU.C, WML 90 EU, WML 922B FR, WMSD 521 EU, WMSD 601 B EU, WMSF 501 PL, WMSF 501 TK, WMSF 601 EU, WMSF 622 EU, WMSG 601 EU, WMSG 601 PL, WMSG 601 TK, WMSG 602 EU, WMSL 602 IT

INDESIT
XWA81682XW.C, XWA91683XWC, XWE 101683 W UK, XWE91683UKC
How to replace common Whirlpool washer parts

Like all machines, Whirlpool washers occasionally experience malfunctions that require certain parts to be replaced. Luckily for you, many of these parts can be replaced without the need for an expensive service call.
Below, you’ll find some of the most common parts that need to be replaced on Whirlpool washers and how you can do it yourself. Find the full set of instructions for each part by visiting the link in each corresponding section.
If you need any replacement parts for your Whirlpool washer, you can enter your model number at AppliancePartsPros.com to order them. Most orders arrive in just two business days, and we have thousands of free guides to show you how to install your new parts.
Important: The part replacement information in this article is based on general service manuals and may not apply to your specific appliance model. While we strive to offer helpful advice for DIY appliance repairs, variations in models and configurations can lead to differences in troubleshooting steps, error codes and part replacements. For the most accurate guidance, we strongly recommend consulting the technical sheet for your specific appliance model.
Contents hide
Safety tips
- Always power off and unplug your appliance or switch off the circuit breaker before you attempt any maintenance or replacement work. This keeps you safe by eliminating any risk of electric shock.
- If the appliance has recently been used, give it plenty of time to cool down before working on it.
- Take your time while working to prevent accidents and personal injuries. Rushing is the enemy of precision.
- Work in a well-lit area so you can see and access appliance parts.
- Keep your workspace free of clutter and other obstacles. Keep children and pets away from the work area.
- Never work on internal parts with wet hands. Make sure the work area is completely dry.
- Check the user manual to see if there are specific installation or safety instructions related to your appliance or replacement part.
- Be gentle when handling or removing parts. Excessive force might damage the appliance or cause personal injury.
- Wear insulated work gloves to protect your hands from sharp metal parts and debris.
- When working with wires, avoid touching any exposed wires or terminals. If you need to touch a wire, use a non-conductive tool or wear insulating gloves to prevent electrical shock.
- Always take photos or make a note of wiring terminals or other connections before disconnecting them to make reassembly easier.
- Turn off the water supply at the outlet before beginning repairs. Keep towels ready to catch any residual water in the system when removing parts.
How to replace suspension rods (top-load washer)
If your top-load Whirlpool washer’s tub is sagging on one side or banging against the cabinet during the wash and spin cycles, it likely needs a new suspension rod kit. The suspension rods help keep the tub balanced, but they can wear out over time.
- Remove the 1/4-inch screws of the top panel hinges and the hose cover panel at the back of the washer.
- Take off the rear hose and harness access panel.
- Pull the top panel forward and lift the top panel up, then lean it back against the wall.
- Move the washer tub to the side to access each rod.
- Grab the rod and pull it up to detach it from the bearing.
- Turn the bearing to fully disconnect the rod, then slowly lower it.
- From inside the washer, press up on the insert at the bottom to detach it.
- At the bottom of the tub, the suspension insert will have tabs that will need to be pressed in so that the insert can be pushed down and the rod can be removed. Repeat this process for all 4 suspension rods.
- Insert each new rod through the cutout along the side or back of the washer tub.
- Lift up the insert at the bottom and press it in so the tabs lock into place.
- Pull the rod up and install the new bearing. Turn it 90 degrees to lock it. Repeat this process to install all 4 new suspension rods.
How to replace a shock absorber (front-load washer)
The shock absorbers in a front-load washing machine provide support for the tub and absorb vibrations during the wash cycle. If your washer is making loud banging or rattling noises during the spin cycle, one or more shock absorbers may be worn out and need to be replaced.
- Remove the three screws holding the top in place.
- Push the top back slightly and lift it off the washing machine.
- Pull out the detergent dispenser drawer.
- Remove the two Torx screws beneath the drawer.
- Lift up the top of the control panel to release the locking tabs and unplug the control wiring.
- Remove the control panel retainer clip and set the panel aside.
- Open the washer door and remove the Torx screw above the door latch.
- Push in the door latch and slide it off.
- Pull up the retaining spring around the door seal and pry it off.
- Pull back the front lip of the door seal.
- Close the door and carefully tilt the washing machine back.
- Place a 2×4 block under the front bottom edge to hold the washer at an angle.
- Use a 1/4-inch nut driver to remove the four screws at the bottom of the front panel.
- Tilt the washer slightly, remove the 2×4 block, remove the screws at the top of the front panel, and pull off the front panel.
- Find the locking tabs on the top and bottom of the old shock absorber. Release the tabs and detach the absorber.
- Fit the bottom of the new shock absorber into place and turn it clockwise to lock it in.
- Extend the shock and fit the top into the mounting bracket, again turning it clockwise to lock.
How to replace the drive belt (top-load washer)
The drive belt is a rubber piece that connects the electric motor to the gear case and tub. When the motor spins, the drive belt rotates the gearcase pulley, which moves the basket or agitator depending on what mode the pulley clutch is shifted to. Over time, this belt can become loose, damaged, or worn out from friction. A stretched or slipping belt can prevent your washer from agitating or spinning properly.
- Unplug the washer from the power outlet.
- Tilt the washer back slightly by leaning it against a wall.
- Find the belt cover on the bottom of the washer, behind the front panel.
- Remove the two screws holding the belt cover.
- Pull the belt cover straight off and set it aside.
- Find the old drive belt around the motor pulley and gear case pulley. While holding the belt at one pulley, turn the other pulley to loosen the belt. Pull downward on the belt to remove it from both pulleys.
- Clean the area where the old belt was as needed. Make sure there’s no debris or remnants of the old belt before you install the new belt. If you need to wipe it down, make sure the area is completely dry before proceeding.
- Drape the new belt over the motor pulley. Make sure it’s seated well in the groove.
- Stretch the belt around the gear case pulley by turning the pulley while holding tension on the belt. Make sure it’s seated in the gear case pulley groove.
How to replace the water inlet valve (top-load washer)
If your washer isn’t filling with water, leaks from the valve, doesn’t dispense soap or doesn’t rinse out detergent well enough, then you may need to replace the water inlet valve.
- Unplug the washer from the power outlet and turn off the water supply to the washer.
- Remove the rear console panel by taking out 5 screws and the hose cover plate.
- Open the spring clips on either side of the control panel and lift the panel up and off.
- Disconnect the control panel plug by pressing the tab and pulling it out.
- Remove the control panel by sliding it forward and off.
- Use a flathead screwdriver to pry off the 3 plugs from the old water inlet valve.
- Remove the 2 screws holding the valve. Lift the old valve up and turn it over.
- Disconnect the harness plug by pressing the tab and pulling it out.
- Use pliers to remove the retainer clip from the harness. Free the harness from its hook.
- Install the new valve by connecting the harness and securing it with the retainer clip.
- Insert the 3 ports into the openings and secure them with the 2 screws.
- Reconnect the 3 plugs to the new valve.
How to replace the drain pump (front-load washer)
The drain pump assembly helps drain water out of the washing machine during the spin and drain cycles. Over time, the pump can wear out or become clogged with debris. If it’s damaged or severely clogged, you’ll need to replace it.
- Turn off the washer and disconnect it from the power supply.
- Turn off the washer’s hot and cold water supply valves at the outlet.
- Remove the three screws that hold the rear of the top panel in place.
- Push the panel back slightly and lift it to remove it. Set it aside.
- Pull out the detergent dispenser drawer and release the locking tab on the rear of the drawer.
- Remove the dispenser housing and set it aside.
- Remove the two screws at the base of the control panel.
- Carefully lift the top while pressing the release tabs on each side of the panel.
- Unplug the wiring connectors and remove the control panel.
- Open the washer door.
- Remove the three screws along the top of the front panel.
- Remove the door lock assembly.
- Carefully remove the spring from around the gasket and pull the gasket away from the front panel.
- Tilt the washer back onto a 2×4 board.
- Remove the four screws at the base of the front panel, then lift off the front panel.
- Lay a towel underneath the open base of the washer to catch water.
- Turn the drain filter counterclockwise.
- Use a shop vac to remove all water inside.
- Pull the rubber drain hose off the outlet port on the pump assembly.
- Disconnect the two wiring harnesses from the pump motor terminals.
- Release the two rubber mounting grommets from the bottom of the pump.
- Remove the old pump.
- Seat the two rubber mounting grommets into the bottom of the new pump.
- Attach the drain hose to the outlet port and secure the clamp.
- Connect the two wiring harnesses to the motor terminals.
- Position the new pump assembly into place by aligning the grommets with the mounting holes.
How to replace the agitator dogs (top-load washer)
Washer agitator dogs are small plastic pieces inside the agitator that help the agitator move in one direction, pushing and pulling your laundry through water and detergent to get it clean.
- Unplug the washer from the power outlet and shut off the water supply.
- Open the washer lid and remove the fabric dispenser.
- If there’s a cap under the fabric dispenser, use a flathead screwdriver to pry it off.
- Check if the dust cap seal is damaged. If it’s damaged, replace it with a new one.
- Underneath the dust cap, find the inner agitator assembly and the hold-down bolt. Use your 7/16-inch socket to remove the bolt.
- Lift the agitator out of the washer. The bolt will remain in the agitator.
- Stand on the lower half of the agitator and pull up on the upper half to separate them.
- Dump the upper agitator upside down to access the old agitator dogs and the cam assembly.
- Remove the retaining bearing to free the old agitator dogs.
- Place the new agitator dogs onto the cam assembly and make sure they’re oriented correctly. The curve of the cam should match the shape of the dogs.
Looking for more?
Thanks for reading! If you still need replacement parts for your Whirlpool washer, check out AppliancePartsPros.com, where you can enter your model number to find exactly what you’re looking for. Most orders arrive in two business days, and we have thousands of free resources to show you how to install your new parts.
You can also reach our award-winning customer service team at 1-877-477-7278, chat with a pro on our website and watch thousands of free video tutorials on our YouTube channel.
Share this entry
- Share on Facebook
- Share on Twitter
- Share on WhatsApp
- Share on Pinterest
- Share on LinkedIn
- Share on Tumblr
- Share on Vk
- Share on Reddit
- Share by Mail
https://www.how-to-repair.com/finding-a-leak-replace-washing-machine-soap-draw-fill-hose/https://www.appliancepartspros.com/b/how-to-replace-common-whirlpool-washer-parts/