Hotpoint HSM25GFRESA Owner’s Manual And Installation Instructions
Do you have a question about the HSM25GFRESA and is the answer not in the manual?
Ask a question
Questions and answers
Subscribe to Our Youtube Channel
Related Manuals for Hotpoint HSM25GFRESA
25.0 cu. ft. side-by-side refrigerator with dispenser (2 pages)
Energy guide (1 page)
Side by side refrigerators (64 pages)
25.0 cu. ft. side-by-side refrigerator with dispenser (2 pages)
Hotpoint refrigerators owner’s manual (64 pages)
Side by side (65 pages)
Ge hsh22ift: user guide (64 pages)
Modds 20, 22, 25 (65 pages)
Refrigerator (12 pages)
Built in integrated larder fridges (17 pages)
HSM25GFTASA Hotpoint Refrigerator – Overview
Model has been saved to My Models. If you’re not signed in, your lists are available on this device and will expire within 30 days. Model has been saved to My Models.
Now you can quickly find repair help, videos, and official parts for your exact model.
Sections of the HSM25GFTASA
[Viewing 8 of 8]
FREEZER DOOR
FREEZER SECTION
FREEZER SHELVES
FRESH FOOD DOOR
FRESH FOOD SECTION
FRESH FOOD SHELVES
ICE MAKER & DISPENSER
SEALED SYSTEM & MOTHER BOARD
Parts for the HSM25GFTASA
Keep searches simple, eg. “belt” or “pump”.

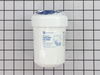
PartSelect #: PS8746144
Manufacturer #: MWFP
This OEM ice and water filter fits side-by-side and bottom-freezer GE models. The most common reason you would need to change this part is if you have never updated your model and it is no longer filt.
Add to cart
Order within the next 7 hrs and your part ships today!

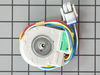
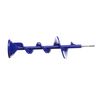
PartSelect #: PS17626595
Manufacturer #: WR29X43990
The ice bucket auger is located within the ice bucket assembly in your freezer. It stirs and dispenses the ice in the bucket. You may need to replace the auger if your ice maker is noisy, or not dispe.
Add to cart
Order within the next 7 hrs and your part ships today!

PartSelect #: PS304103
Manufacturer #: WR55X10025
This sensor (Temperature Sensor, Thermistor, Refrigerator Temperature Sensor) sends the temperature reading of the compartment to the control board. If you notice your refrigerator is too warm, too co.
Add to cart
Order within the next 7 hrs and your part ships today!

PartSelect #: PS1017716
Manufacturer #: WR50X10068
This defrost termination thermostat (Defrost Limiter Thermostat, High Limit Thermostat, Refrigerator Defrost Bi-Metal Thermostat) acts as a safety device to stop the evaporator coil from overheating, .
Add to cart
Order within the next 7 hrs and your part ships today!
PartSelect #: PS16226572
Manufacturer #: WR57X33326
This water inlet valve (Refrigerator Water Inlet Valve Assembly) supplies water to the ice maker and the water dispenser in your refrigerator. It is located at the back of the fridge, beneath the bott.
Add to cart
Order within the next 7 hrs and your part ships today!

PartSelect #: PS1993870
Manufacturer #: WR30X10093
This 10 by 5 inch ice maker (Electromechanical Icemaker Kit, Ice Maker Assembly) produces ice. This particular model will produce seven crescent shaped cubes every cycle. It is constructed of plastic .
Add to cart
Order within the next 7 hrs and your part ships today!

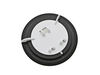
PartSelect #: PS964304
Manufacturer #: WR17X11653
This “Dispenser Door Assembly” (Door Recess Assembly, Ice Door Assembly, Dispenser Door, Refrigerator Dispenser Ice Chute Door Kit, Dispenser Door Flap, Ice Chute Door, Flapper) keeps the room air fro.
Add to cart
Order within the next 7 hrs and your part ships today!

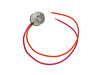
PartSelect #: PS1483583
Manufacturer #: WR62X10055
This genuine OEM solenoid is designed for use with GE refrigerators and controls the opening and closing of the ice chute door. It serves as a direct replacement for a worn or faulty solenoid, helping.
Add to cart
Order within the next 7 hrs and your part ships today!

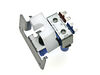
PartSelect #: PS16729744
Manufacturer #: WR55X10942C
This electronic board (Main Control Board Assembly, Control Board, Motherboard) controls the temperature and defrost functions of the unit. This control board is located on the back of the refrigerato.
Add to cart
Order within the next 7 hrs and your part ships today!

PartSelect #: PS303781
Manufacturer #: WR51X10055
The defrost heater keeps the cooling coils from frosting over. The heater will get hot and melt any ice or frost build up around the coils.
Add to cart
Order within the next 7 hrs and your part ships today!

PartSelect #: PS3487932
Manufacturer #: WR32X10834
Sold individually. This is used in refrigerator to store vegetable and fruits at an optimal temperature
Add to cart
Order within the next 7 hrs and your part ships today!

PartSelect #: PS285013
Manufacturer #: WR02X10585
This door recess spring or dispenser lever spring in your refrigerator is used to return the ice door to the closed position or the dispenser lever to the home position once released. You will find th.
Add to cart
Order within the next 7 hrs and your part ships today!
Back to Top
Manuals & Care Guides for HSM25GFTASA
Click to download
Owner’s Manuals
Questions And Answers for HSM25GFTASA
ASK A QUESTION
We’re sorry, but our Q&A experts are temporarily unavailable.
Please check back later if you still haven’t found the answer you need.
3 questions answered by our experts.
Search filter:
Your search term must have 3 or more characters.
Keep searches simple. Use keywords, e.g. “leaking”, “pump”, “broken” or “fit”.
Sorry, we couldn’t find any existing answers that matched.Try using some different or simpler keywords, or submit your new question by using the “Ask a Question” button above!
February 7, 2023
I’m convinced the noise it was making was the evaporator fan. Now the fans not working at all and the freezer started defrosting from the top down. Is it just that motor or could it be something else as well? and is it all right to leave the refrigerator running like that for a month?
For model number HSM25GFTASA
Hi Mark, thank you for reaching out. If the Evaporator Fan Motor, part number PS1019114 was making an excessive noise and stopped working it can not circulate the air over the coils to cool the appliance and it will unthaw and defrost and the appliance will warm up. The Evaporator Fan Motor should be replaced. We hope this solves your problem!
3 people found this helpful.
Was this helpful?
Thank you for voting!
Related Parts:
Add to cart
August 15, 2023
The water line has no power. It doesn’t make ice and the water dispenser has no power. Is there an on off switch for the water line? Water pump issue? Thanks.
For model number HSM25GFTASA
Hello Brian, thank you for your inquiry. Based on the description that you have provided, we would recommend replacing the dispenser control board, part number PS1155334. We hope this helps, good luck with this repair!
Was this helpful?
Thank you for voting!
Related Parts:
No Longer Available
August 23, 2023
The waterline had no power. It does not make ice and when trying to dispense water nothing happens. The ice dispenser does work if I put ice into the ice tray. All of the other controls on the the control panel work fine. I did install a new water filter recently. Thanks.
For model number HSM25GFTASA
Hello Brian, thank you for the question. We have found that to fix your issue, you may have to replace the water inlet valve, part number PS16226572. If the cold water is not coming out of the water dispenser, or if the ice maker would not dispense ice, the water inlet valve may be at fault. We hope this sorts out your problem!
Was this helpful?
Thank you for voting!
Related Parts:
Add to cart
Back to Top
Common Symptoms of the HSM25GFTASA
[Viewing 28 of 28]
Fridge too warm
Fixed by
these parts

Show All
Not dispensing water
Fixed by
these parts

Show All
Fixed by
these parts
Show All
Ice maker won’t dispense ice
Fixed by
these parts
Show All
Freezer section too warm
Fixed by
these parts
Show All
Fixed by
these parts

Show All
Ice maker not making ice
Fixed by
these parts

Show All
Freezer not defrosting
Fixed by
these parts
Show All
Frost buildup
Fixed by
these parts
Show All
Will Not Start
Fixed by
these parts

Show All
Fridge too cold
Fixed by
these parts
Show All
Light not working
Fixed by
these parts

Show All
Door Sweating
Fixed by
these parts
Show All
Door won’t open or close
Fixed by
these parts

Show All
Fridge and Freezer are too warm
Fixed by
these parts
Show All
Ice maker dispenses too little ice
Fixed by
these parts
Show All
Fixed by
these parts
Show All
Door latch failure
Fixed by
these parts

Show All
Freezer too cold
Fixed by
these parts
Show All
Clicking sound
Fixed by
these parts
Show All
Fridge runs too long
Fixed by
these parts
Show All
Ice maker dispenses too much ice
Fixed by
these parts

Show All
Doesn’t stop running
Fixed by
these parts
Show All
Won’t start
Fixed by
these parts
Show All
Engine revs but auger will not turn
Fixed by
these parts
Show All
Fixed by
these parts
Show All
Touchpad does not respond
Fixed by
these parts
Show All
Engine runs but cutters do not turn
Fixed by
these parts
Show All
Back to Top
Videos related to models starting with HSM25GFTASA
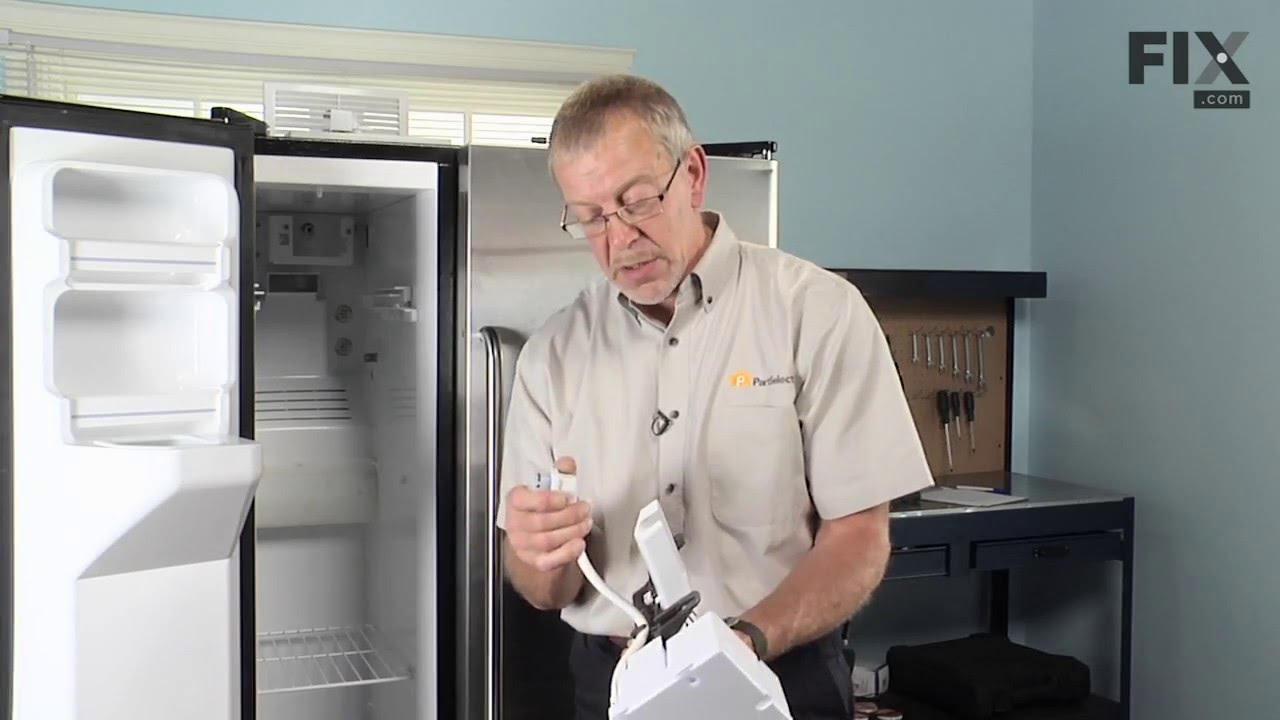
Replacing the BUCKET AUGER
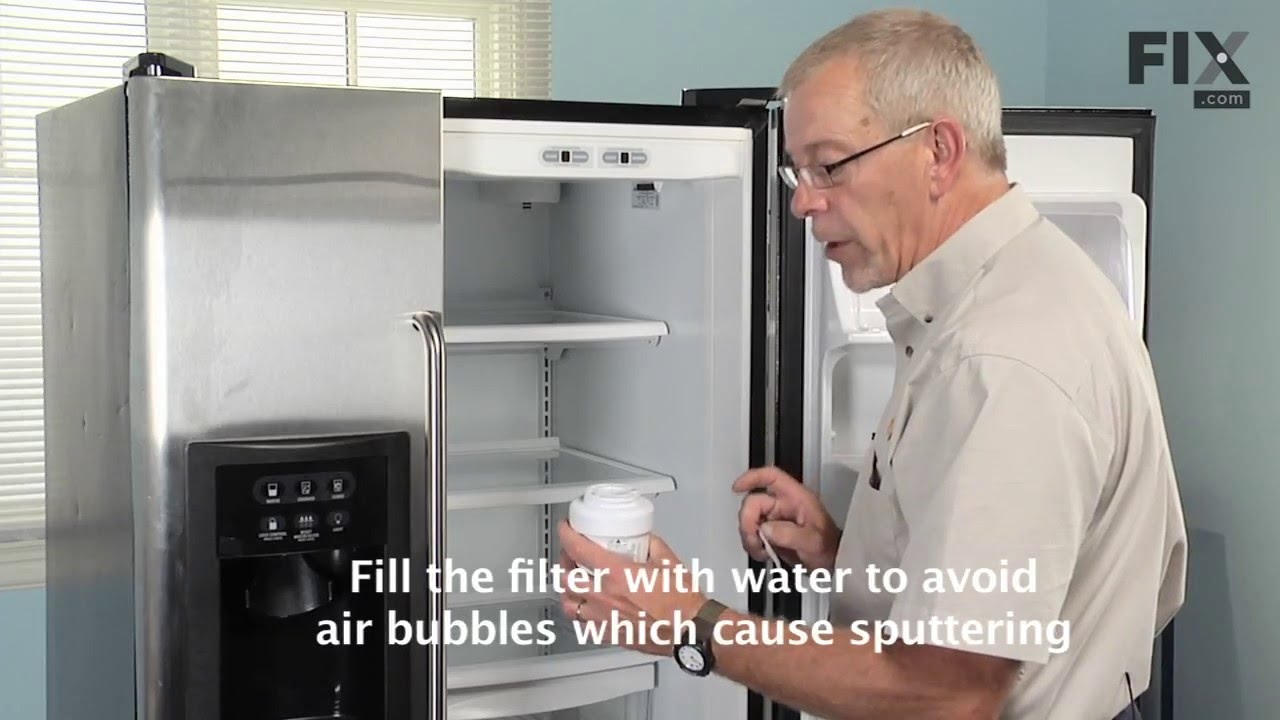
Replacing the Refrigerator Ice and Water Filter
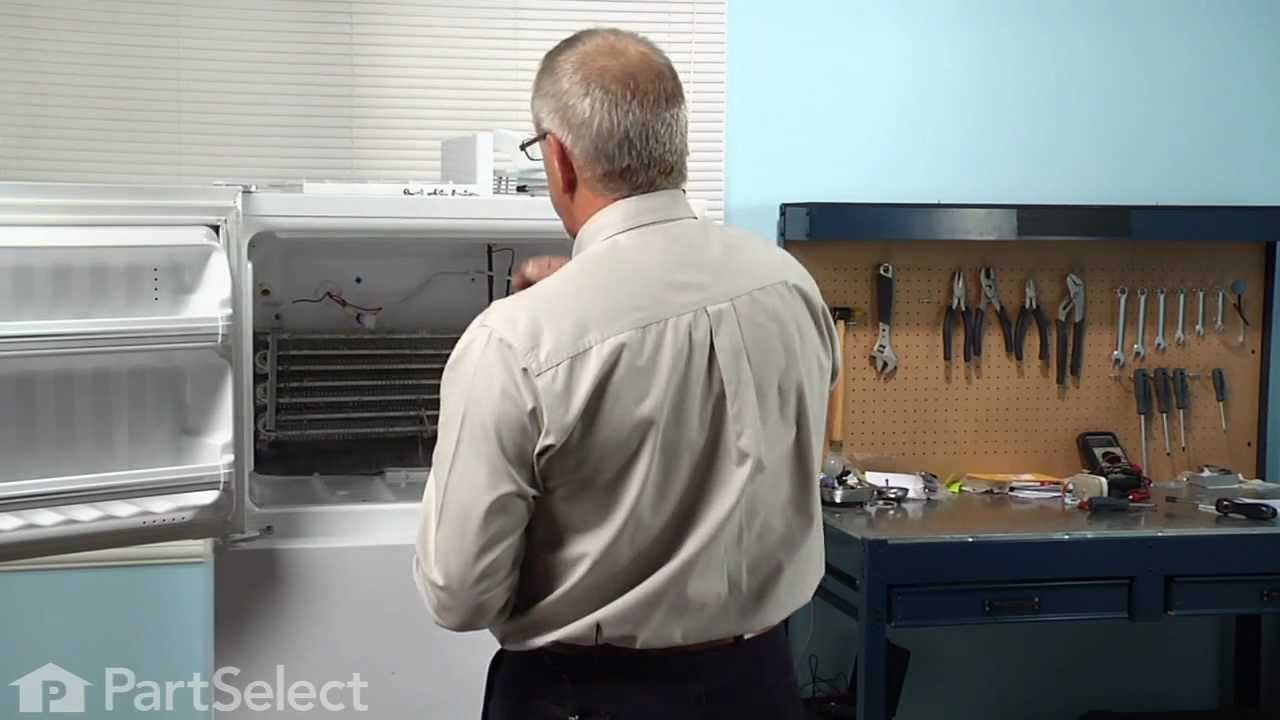
Replacing the Refrigerator Temperature Sensor
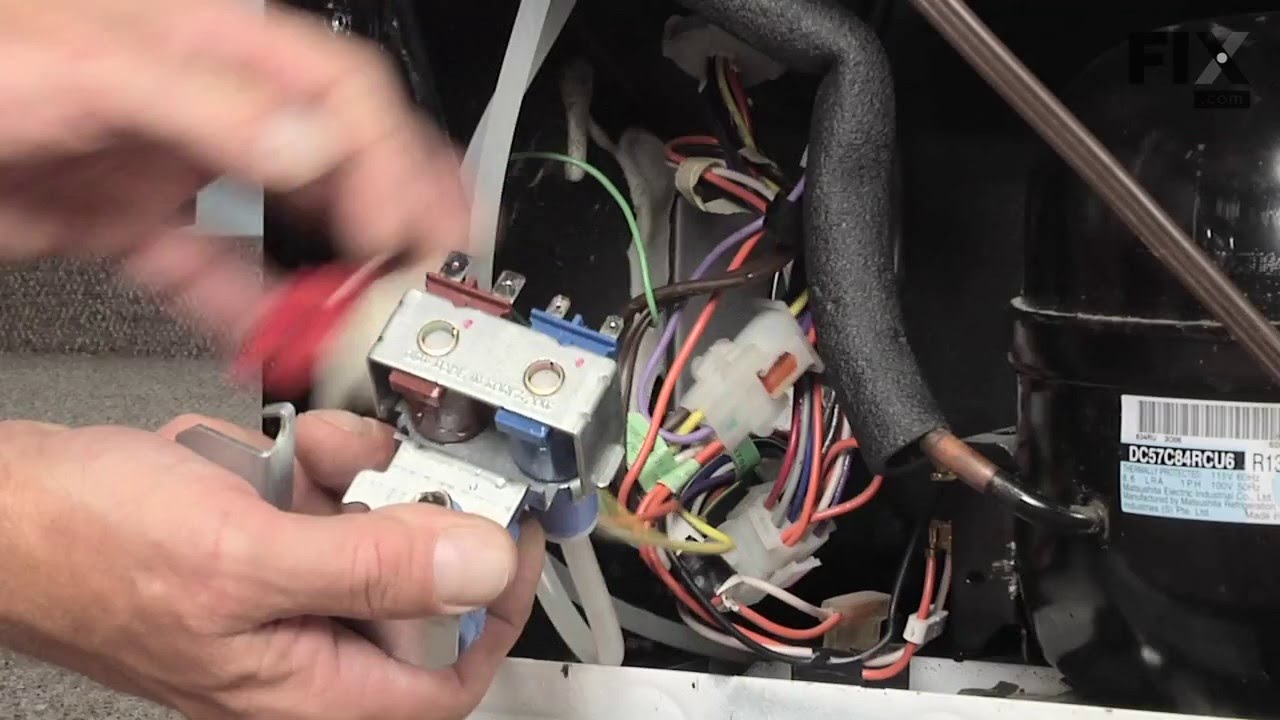
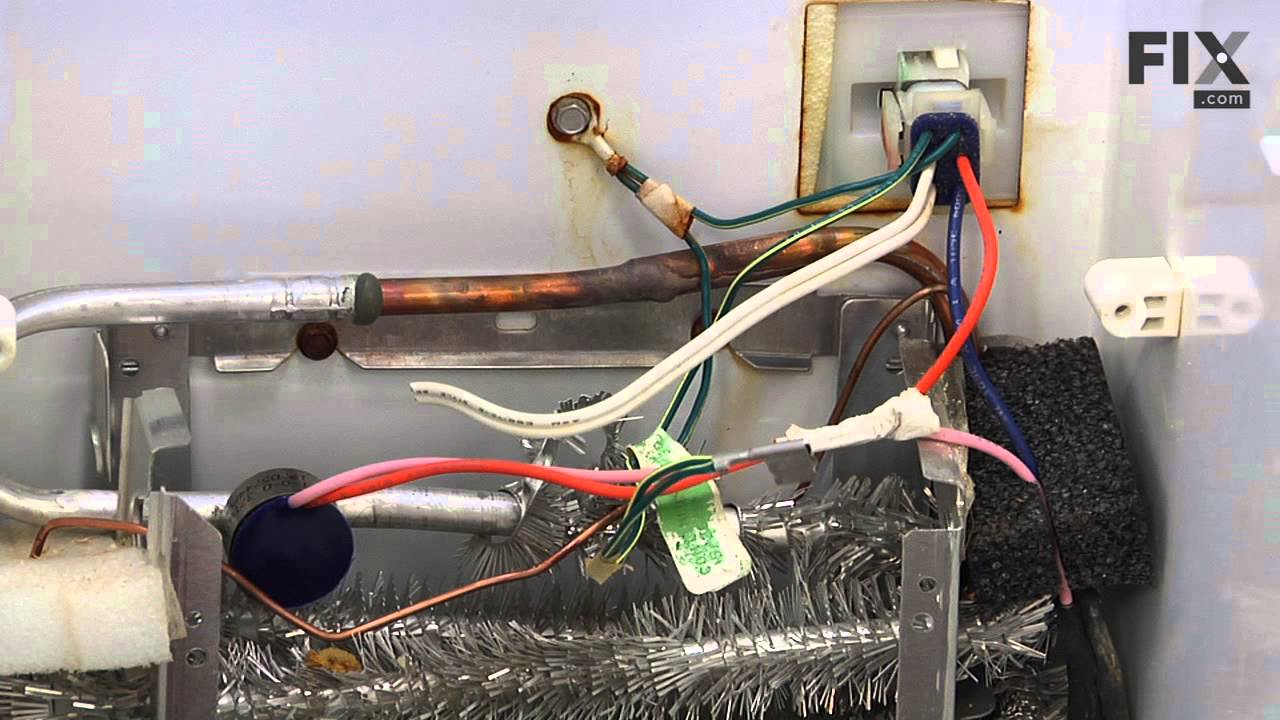
Replacing the WATER VALVE WITH GUARD
Replacing the Refrigerator Ice Maker
Replacing the Refrigerator Evaporator/Condensor Fan Grommet
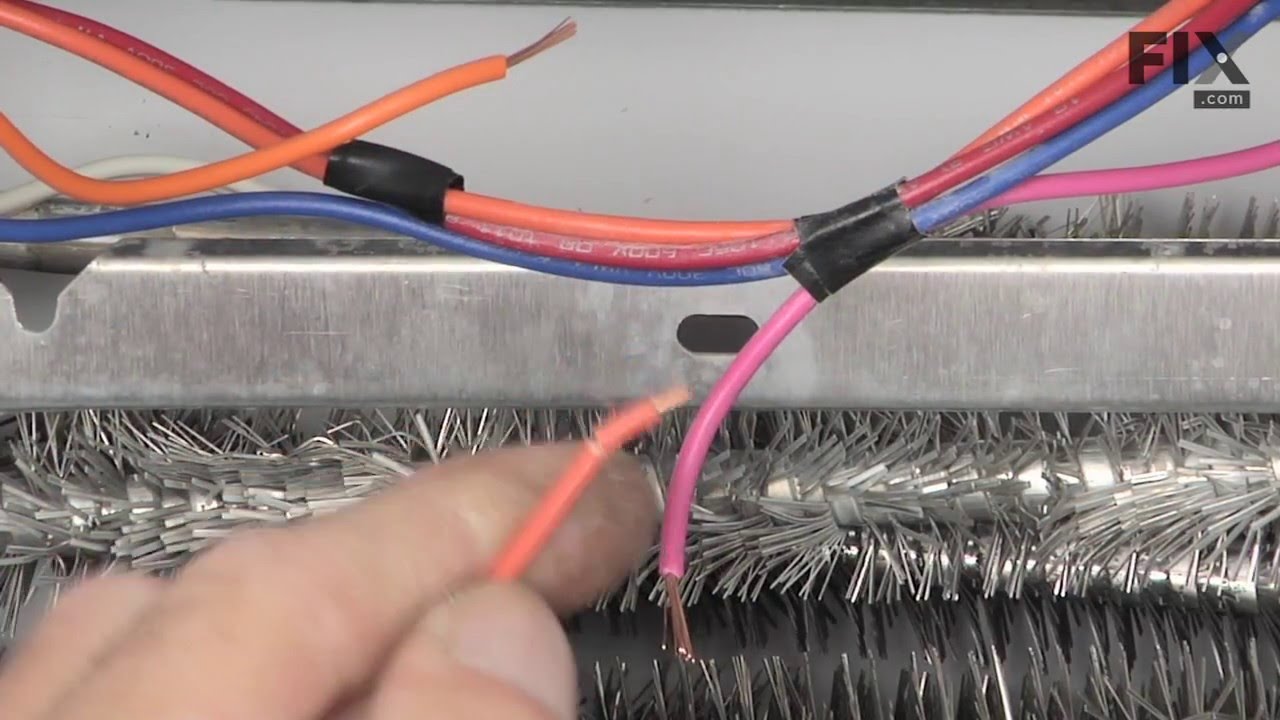
Replacing the Refrigerator Defrost Thermostat
Replacing the Refrigerator Dispenser Door Solenoid Assembly
Back to Top
Installation Instructions of parts on the HSM25GFTASA
Keep searches simple. Use keywords, e.g. “leaking”, “pump”, “broken” or “fit”.
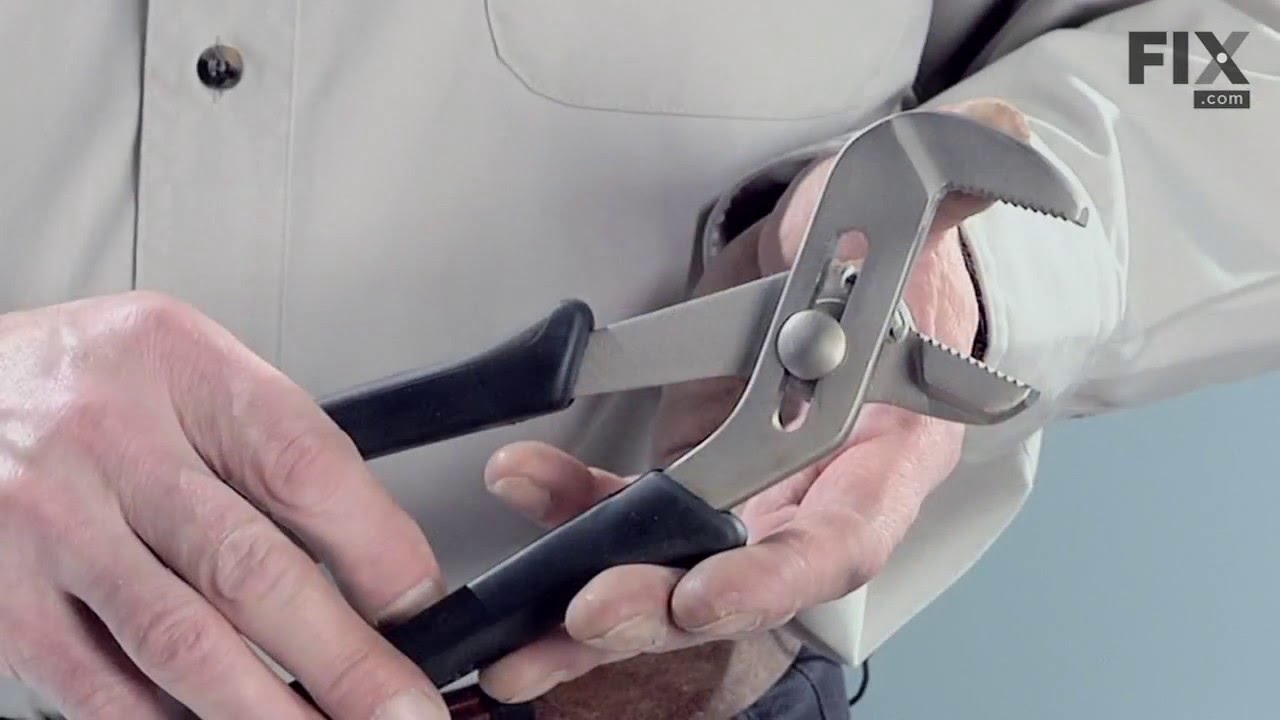
The very first symptom here is important! The door water dispenser is not working but the ice macine is working. You may only have a frozen water tube in the door so do the following before diagnosing that your solenoid valve is bad: 1) the tube usually runs under the front of the refrigerator and usually has a quick disconnect. Undo t . Read more he connection and press the dispenser. If water comes out of the tube you have a frozen or blocked tube in the door. 2) Immediately adjust the temperature in the freezer and warm the freezer compartment as much as you can without destroying the freezer contents. Wait 24 hours. This will usually unfreeze the line. Do not waste your time with a hair dryer. NOW, if this doesn’t work and you are convinced you need to order and replace the solenoid, follow these steps. Assemble your tools first. I needed a good ratchet set and a screwdriver. A shop towel is helpful for spilled water. A light is handy. Pull out the refreigerator to gain access to the rear of the unit. Unplug the power and close the water valve (older homes, you may need to actually shut the house water supply). Remove the screws which hold the cover over the lower half of the refrigerator. On the left you will see the solenoid. It’s always good to see that your new part matches the one you feel needs replaced. They may not match perfectly due to changing design but they should be very similar. One screw holds this part in place and access is very simple. Now simply unplug the electrical connections. In my case, one blue “blade” type connection (powering the water) and one red “blade” type connection powering the ice maker. They are not the same size and this coupled with the coloring means you will not accidently switch them. pull the tubes clear of the solenoid. This is simple and needs no explantion. Grab your new solenoid and reattach both the electrical and water lines (two, remember, ice maker and drink dispencer). Replace the single screw. Re-attach the rear, lower refrigerator cover and go to the front of the unit to check the water. You can listen carefully and hear the power engage from the new part bringing you water. Clean up, replace the refrigerator back to its place and look really tired when your wife sees that you worked “so hard”! You probably saved at least $50-$80 from a service call which can now be used to take the family to dinner after your “exhausting” 15 minute workout of removing about 10 screws and wheeling the unit in and out of place. Writing this article took longer! My 4 year old worked harder holding the flash light!
Parts Used:
ralph from bristow, VA
Difficulty Level:
Really Easy
Total Repair Time:
Less than 15 mins
Nutdriver, Screw drivers, Socket set
1033 of 1152 people found this instruction helpful.
Was this instruction helpful to you?
Thank you for voting!
I used a digital camera and photographed the assembled unit and the metal blades before I started the repair. Then, I removed the top screw on the clear shield. Flip over ice tray and removed two Phillips screws on bottom. Exterior plastic white cover comes off next. The cover sides have hard push-in white plastic tabs. Push them in; pry . Read more up top cover with small flathead screwdriver. Slide white top cover up and you will now see the metal blades and assembly. Auger is held in place with a metal c-clip and washer on the end. Use flat head screwdriver to pry off c-clip. Then you will see a nylon round slotted nut. The threads are reverse, use pliers and loosen nut. It is not that tight but pliers are needed. Then it all is loose and ready for removal. I slid all the blades off at one time and kept them stacked together. Slide out auger and clear flat shield cover. Install new auger, clear shield, and metal blade stack. When you put it all back together take a look at the long metal J-hook on the bottom make sure it is in the slot before you make everything tight. Failing to do this will prevent cubed ice from dispensing.
It is not that hard to do the repair it just takes some patience and paying attention to details.
https://www.manualslib.com/manual/502317/Hotpoint-Hsm25gfresa.htmlhttps://www.partselect.com/Models/HSM25GFTASA/